Embarking on your journey as an acrylic landscape artist is an exciting endeavor. Acrylics are a fantastic medium for new artists due to their versatility, vibrant colors, and quick-drying nature. At URARTSTUDIO, we’re committed to supporting beginners with practical advice to build confidence and skills. In this blog, we’ll cover the essential tools you need for acrylic landscape painting and offer actionable tips to help you create captivating scenes right from the start.

Must-Have Tools for Acrylic Landscape Painting
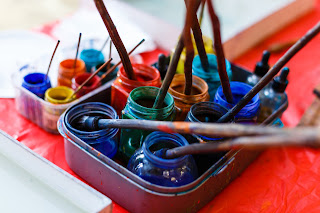
Starting with the right tools sets a solid foundation. First, invest in a basic set of acrylic paints with primary colors (red, blue, yellow), black, and white—you can mix a wide range of hues for landscapes from these. Next, get a variety of brushes: a large flat brush for skies and backgrounds, a medium round brush for details like trees, and a fan brush for textured effects like grass or clouds. A palette (or even a disposable plate) is essential for mixing colors, while a canvas or heavy paper designed for acrylics provides a sturdy surface. Don’t forget a water container and paper towels for cleaning brushes, as acrylics dry fast and can ruin bristles if not cleaned promptly .
Setting Up Your Workspace
Create a comfortable, well-lit workspace to focus on your art. Lay down newspaper or a drop cloth to protect surfaces from paint spills. Keep your tools within reach and ensure good ventilation if you’re using acrylic mediums or varnishes. Natural light is ideal for seeing true colors, but a daylight lamp works well for evening painting sessions. A clutter-free space helps reduce stress and lets you immerse yourself in capturing the mood of a landscape .
Starter Tips for Painting Landscapes
- Start Simple: Choose a basic scene for your first painting, like a sunset over a hill. Sketch the main shapes lightly with a pencil on your canvas to plan your composition before applying paint. This helps avoid frustration with proportions early on .
- Layer from Back to Front: Begin with the background—sky and distant elements—using a large flat brush with broad strokes. Move to midground features like hills, then foreground details like trees or rocks with smaller brushes. Acrylics’ quick drying lets you layer without waiting long .
- Experiment with Color Mixing: Don’t be afraid to mix colors on your palette to match the tones of nature. Add a touch of white to create lighter shades for sunlit areas or black for shadows. Test mixes on scrap paper to see how they look when dry, as acrylics can darken slightly .
- Use Water Wisely: Dip your brush in water to thin paint for washes (like a soft sky), but avoid over-wetting, as it can make the paint runny and hard to control. Keep a paper towel handy to blot excess water from your brush .
Overcoming Common Beginner Challenges
New artists often struggle with blending or texture. If colors dry too fast to blend smoothly, mist your canvas lightly with water from a spray bottle to extend working time. For texture issues, practice using a fan brush to suggest foliage—dab lightly instead of dragging for a natural look. Remember, mistakes are part of learning; acrylics allow you to paint over errors once dry, so don’t hesitate to adjust as you go .
Final Thoughts
Acrylic landscape painting is a rewarding skill that grows with practice. Start with the right tools, set up an inspiring workspace, and apply these beginner-friendly tips to build your confidence. Every brushstroke teaches you something new about capturing the beauty of nature. Keep experimenting, and soon you’ll develop your unique style.
For more detailed guidance, explore our free online step-by-step landscape painting tutorials, painting tips, and resources—all at no cost. Visit URARTSTUDIO to access these tools, view our virtual gallery, and even purchase original artworks to inspire your journey.
#AcrylicPainting #BeginnerArtists #LandscapeArt #PaintingTips #URARTSTUDIO
Acrylic landscape painting is a dynamic way to express the beauty and emotion of natural scenes. At URARTSTUDIO, we’re passionate about helping artists of all levels refine their craft and bring their visions to life. In this article, we’ll dive into techniques for capturing mood and atmosphere in your acrylic landscapes, turning simple scenes into evocative masterpieces.

Understanding Mood and Atmosphere
Mood and atmosphere in a painting are the emotional undercurrents that draw viewers in—whether it’s the tranquility of a misty morning or the drama of a stormy sky. Acrylics, with their vibrant colors and fast-drying properties, are perfect for manipulating tones and textures to convey these feelings. Start by deciding the emotion you want to evoke before picking up a brush; this guides your color choices and brushwork .
Color Choices to Set the Tone
Colors are the foundation of mood. For a serene landscape, use cool blues and soft greens with subtle gradients to suggest calmness, blending them smoothly with a flat brush for a cohesive look. For a dramatic scene, incorporate deep purples, fiery oranges, or stark contrasts between light and dark to heighten intensity. Experiment with glazing—applying thin, transparent layers of acrylic—to build depth and shift the emotional tone over multiple layers .
Manipulating Light for Emotional Impact
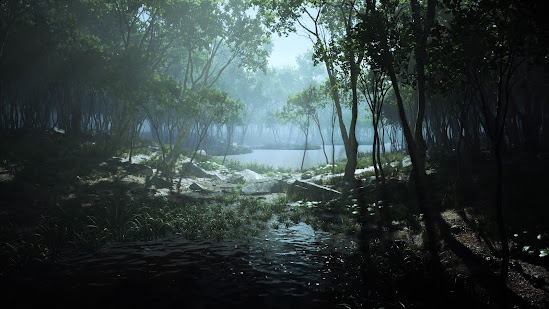
Light shapes atmosphere more than any other element. A warm, golden glow can evoke nostalgia or peace, while harsh, angular shadows might suggest tension. Use a lighter hand with diluted acrylics to create soft, diffused light for foggy or overcast scenes, applying it with a wide brush for even distribution. For intense sunlight, layer bold highlights with a smaller brush on focal points like treetops or water surfaces to draw the eye and amplify the mood .
Texture as a Storytelling Tool
Textures in acrylic painting can reinforce the atmosphere. Rough, dry brush strokes can mimic the ruggedness of a windy cliffside, adding a sense of raw energy—use a stiff-bristled brush for this effect. Conversely, smooth, blended strokes can convey stillness, ideal for calm lakes or distant horizons; a filbert brush works well here for seamless transitions. Play with palette knives to scrape or layer thick paint for added tactile emotion in stormy or turbulent landscapes .
Composition to Guide Emotional Flow
How you arrange elements in your painting directs the viewer’s emotional journey. Place a solitary tree or figure off-center using the rule of thirds to evoke loneliness or quiet reflection. Create depth with leading lines—like a winding path or river—to pull viewers into the scene, enhancing a sense of mystery or adventure. Sketch your composition lightly on canvas first to ensure the layout supports the intended atmosphere before applying paint .
Final Thoughts
Capturing mood and atmosphere in acrylic landscape painting is about intentional choices—color, light, texture, and composition all work together to tell a story beyond the visual. Practice these techniques to infuse your artwork with emotion, transforming a simple landscape into a powerful experience for your audience.
For more in-depth guidance, check out our free online step-by-step landscape painting tutorials, painting tips, and detailed instructions—all at no cost. Visit URARTSTUDIO to explore these resources, browse our virtual gallery, and even purchase original landscape artworks from our featured collection.
#AcrylicPainting #LandscapeArt #PaintingMood #ArtTechniques #URARTSTUDIO
Acrylic landscape painting offers a vibrant and versatile way to capture the beauty of nature, and the right paint brushes can make all the difference in achieving breathtaking results. From creating sweeping skies to intricate foliage, understanding how to select and use brushes effectively—while maintaining them for longevity—can elevate your artwork. Here’s a guide to mastering brushes for acrylic landscape painting with practical tips to enhance your skills.

Choosing the Right Brush for the Job
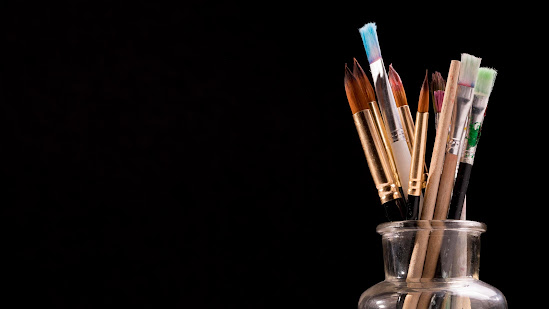
Selecting the appropriate brush is crucial for different elements of a landscape. A flat brush is ideal for broad strokes, perfect for painting expansive skies or calm lakes with even coverage. For detailed work like tree branches or grass, a round brush with a fine tip offers precision. A fan brush excels at creating textured effects, such as feathery leaves or wispy clouds, while a filbert brush—with its rounded tip—works wonders for blending soft edges in rolling hills . Experiment with synthetic brushes, as they hold up well against the fast-drying nature of acrylics and are often more affordable than natural bristles .
Brush Techniques for Landscape Magic
- Blending: Achieve smooth transitions in a sunrise sky by using a flat or filbert brush with a wet-on-wet technique. Apply two colors side by side and blend them quickly with gentle, overlapping strokes before the acrylic dries. Keep a spray bottle handy to mist the canvas lightly if needed for extra blending time .
- Layering: Build depth in your landscapes by layering colors with a flat brush. Start with a base layer of mid-tones for mountains or fields, then add lighter highlights on sunlit areas and darker shadows in recesses using a smaller round brush for control. Acrylics’ quick drying allows for rapid layering without muddying colors .
- Textures: Create realistic textures with specialized brushes. Use a fan brush to stipple or drag lightly for grassy meadows or distant treetops. For rocky surfaces, try scumbling with a dry, worn-out brush to add a rough, uneven texture that mimics natural stone .
Tips for Maintaining Your Brushes
Proper brush care ensures consistent performance and extends their lifespan, saving you time and money. Always clean brushes immediately after use—acrylic paint dries fast and can harden bristles if left too long. Rinse under lukewarm water to remove paint, then use a mild soap or brush cleaner to gently wash the bristles. Reshape the tips with your fingers and lay them flat to dry to prevent warping . Avoid soaking brushes for extended periods, as it can loosen the ferrule (the metal part holding bristles), and store them upright or in a protective case to maintain their form .
Brush Recommendations for Specific Effects
- Sky and Water: A large, soft flat brush (1-2 inches wide) is perfect for smooth gradients in vast skies or reflective lakes. Look for synthetic brushes with softer bristles to minimize streak marks.
- Foliage and Grass: A small fan brush or a medium round brush works best for organic, loose strokes that suggest leaves or blades of grass. Opt for stiffer bristles for better control in detailed areas.
- Details and Edges: A liner or detail round brush (size 0 or 1) is essential for fine lines like distant tree trunks or fence posts. Choose a brush with a sharp point for accuracy .
Practice and Experimentation
Don’t shy away from testing new brushes or techniques on scrap canvas or paper before applying them to your main piece. Practice creating a rugged mountain range with a dry brush technique or a misty horizon with soft blending to build confidence. Over time, you’ll develop a personal connection with your tools, knowing instinctively which brush suits a specific landscape element .
Final Thoughts
Mastering acrylic landscape painting is as much about understanding your brushes as it is about color and composition. By selecting the right tools, honing techniques like blending and layering, and caring for your brushes properly, you’ll unlock endless creative possibilities in your artwork. Keep experimenting with different brushes to discover unique textures and effects that make your landscapes stand out.
For more inspiration and guidance, explore our free online step-by-step landscape painting tutorials, painting tips, and detailed instructions—all at no charge. Visit URARTSTUDIO to dive deeper into the world of acrylic painting.
#AcrylicPainting #LandscapeArt #PaintBrushes #PaintingTips #URARTSTUDIO
Creating a captivating acrylic landscape painting hinges on the skillful use of light and shadows. These elements add depth, dimension, and a sense of realism, transforming a flat scene into a dynamic masterpiece. Whether you’re depicting a sunlit valley or a moody forest at dusk, here’s how to harness light and shadows to elevate your artwork.

Understanding the Role of Light and Shadow
Light and shadow work together to define form and create a three-dimensional feel on a two-dimensional canvas. Light highlights the focal points—think of sunlight glinting off a lake—while shadows carve out depth in areas like the underside of trees or mountain crevices. This interplay can evoke emotion, making a landscape feel alive and immersive . For beginners, recognizing a primary light source (e.g., the sun’s position) is key to maintaining consistency across your painting.
Choosing and Mixing Colors for Light and Shadow
To depict light, use lighter, warmer tones of your base color by mixing in white or yellow. For a grassy hill under midday sun, add titanium white to green for sunlit areas. Shadows require cooler, darker shades—blend in blue, purple, or black to suggest depth. A shadowed slope might combine green with a touch of ultramarine blue to mimic the coolness of shade . Experiment with subtle gradations to avoid harsh contrasts unless aiming for dramatic effects like a storm-laden sky .
Layering and Blending Techniques
Acrylics’ fast-drying nature allows for quick layering, ideal for building light and shadow. Start with a mid-tone base layer for your landscape element (e.g., a mountain in medium gray-blue), then add lighter tones where light hits and darker tones in recessed areas. Use a dry brush technique for soft transitions—lightly drag a nearly dry brush to blend light into shadow for a realistic sunset glow . Wet-on-wet blending can also work if applied swiftly before the paint dries, perfect for diffused morning light on a meadow .
Considering Light Direction for Impact
The direction of light dramatically alters a landscape’s mood. A light source from above, like midday sun, creates short, defined shadows under trees or rocks, emphasizing clarity and vibrancy. Side lighting, such as at sunrise or sunset, casts long, dramatic shadows that stretch across the canvas, adding tension and dynamism to rolling hills . Decide your light source early and keep shadow angles consistent—imagine the sun’s position and sketch faint guidelines if needed to track it .
Practical Tips for Dynamic Results
- Contrast is Key: Amplify contrast between light and shadow to draw the viewer’s eye. A brightly lit cliff edge against a deep, shadowed ravine instantly creates focus .
- Atmospheric Perspective: Use lighter, less saturated colors for distant elements under light to suggest depth, while foreground shadows remain bold and dark .
- Test on Scrap: Before applying to your canvas, test light-shadow combinations on scrap paper to perfect your color mixes with acrylics .
Final Thoughts
Using light and shadows effectively in acrylic landscape painting can turn a static scene into a vibrant, dynamic story. By mastering color mixing, layering techniques, and understanding light direction, you’ll breathe life into your landscapes. Practice observing real-world lighting—watch how shadows fall during different times of day—and translate that into your art for stunning results.
Explore quality acrylic supplies to enhance your work at URARTSTUDIO’s shop, and uncover more techniques on our painting tips page.
#LightAndShadow #AcrylicPainting #LandscapeArt #PaintingTechniques #URARTSTUDIO
Creating a captivating acrylic landscape painting hinges on selecting the right color palette. The colors you choose set the mood, evoke emotion, and bring harmony or contrast to your natural scenes. Whether you’re painting a serene forest or a dramatic sunset, a well-thought-out palette can elevate your work from ordinary to extraordinary. Let’s explore how to craft the perfect color palette for your acrylic landscapes with actionable tips and insights.
Understanding Color Theory Basics
Before diving into selection, grasp the fundamentals of color theory. The color wheel is your guide—primary colors (red, blue, yellow) form the foundation, while secondary (green, orange, purple) and tertiary colors add nuance. For landscapes, focus on complementary colors (opposites on the wheel, like blue and orange) for striking contrasts, or analogous colors (neighbors, like green and yellow) for soothing harmony. This balance helps mimic nature’s diversity .
Consider the Mood and Time of Day
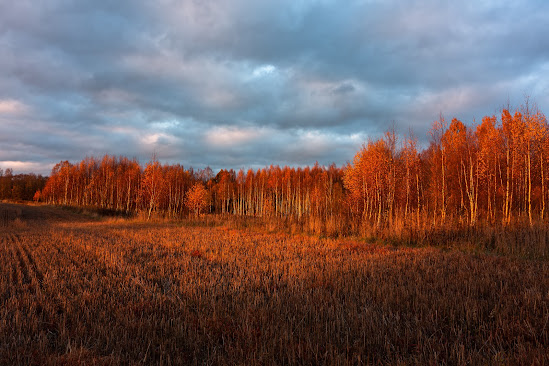
Landscapes are deeply tied to atmosphere. Ask yourself: What feeling or time of day am I portraying? A morning scene might call for soft pastels—pale blues, pinks, and yellows—to convey tranquility. A sunset, however, demands warm, bold tones like fiery oranges, deep purples, and reds for drama. Match your palette to the emotional tone of your painting to guide the viewer’s experience .
Start with a Limited Palette
For beginners, a limited palette of 3-5 colors plus white can simplify decision-making and ensure cohesion. Choose a warm and cool version of a primary color (e.g., cadmium yellow and lemon yellow, ultramarine blue and cerulean blue) plus a versatile earth tone like burnt sienna. Mix these to create greens for foliage, browns for trunks, and grays for shadows. This approach forces you to understand color mixing and builds a unified look in your landscape .
Use Nature as Your Reference
Nature is the ultimate teacher. Study real landscapes or high-quality photographs to observe subtle color shifts. Notice how a tree’s green varies from dark olive in shadows to bright lime in sunlight, or how distant hills fade into bluish grays due to atmospheric perspective. Collect reference images and pull colors directly from them, using acrylic paint swatches to match tones as closely as possible .
Create Contrast for Depth
Contrast is key to making your landscape pop. Pair light and dark values—like a bright sky against a shadowy forest—to suggest depth. Use warm foreground colors (yellows, oranges) against cool backgrounds (blues, grays) to mimic natural recession in space. Test these contrasts on a scrap canvas to see how they interact before committing to your main piece .
Experiment and Adjust
Acrylics are forgiving, so don’t fear experimentation. Lay down a base layer of your chosen palette, then step back to assess. If a color feels off—too vibrant or too dull—mix in a touch of its complementary color to mute it, or add white for a lighter tint. Keep a color journal or chart of mixes to track what works for future paintings .
Final Thoughts
Choosing the perfect color palette for acrylic landscape painting is a blend of science and intuition. By understanding color theory, aligning colors with mood, starting simple, referencing nature, prioritizing contrast, and staying open to experimentation, you can craft palettes that breathe life into your scenes. Take time to play with colors, and soon, selecting the right hues will feel like second nature.
Need tools to build your palette? Explore acrylic paints and supplies at URARTSTUDIO’s shop, and uncover more creative insights on our painting tips page.
#ColorPalette #AcrylicPainting #LandscapeArt #ColorTheory #URARTSTUDIO
Capturing the grandeur of big trees in acrylic landscape painting requires more than just technical skill—it demands creativity and a willingness to experiment. While traditional brushes have their place, utilizing unconventional paint brushes or tools can add unique textures and depth to your towering oaks or sprawling pines. Let’s dive into how you can paint majestic trees with acrylics using unexpected tools to bring your landscapes to life.

Why Unconventional Brushes for Big Trees?
Big trees are a focal point in many landscapes, embodying strength and intricate natural patterns. Standard brushes can sometimes limit the organic, rugged feel of bark or the lush chaos of foliage. Unconventional tools—think household items or specialty brushes—allow for spontaneous, textured effects that mimic nature’s randomness, making your trees stand out with character .
Choosing the Right Unconventional Tools
Here are some alternative “brushes” to consider for painting big trees, each offering a distinct effect:
- Sponges: Use a torn kitchen sponge to dab on layers of foliage. The irregular surface creates a natural, leafy texture perfect for dense canopies. Dip in varying shades of green and brown for depth .
- Toothbrushes: Flick an old toothbrush loaded with paint to splatter tiny specks, simulating distant leaves or rough bark details. This works well for adding fine texture over a base layer .
- Palette Knives: Scrape or drag a palette knife with thick acrylic paint to carve out gnarled trunk textures or sharp branch edges. The impasto effect adds a tactile, three-dimensional quality .
- Twigs or Sticks: Dip a small twig into paint and use it to scratch in fine branch lines or bark grooves. This direct-from-nature tool mirrors the tree’s own form for an authentic look .
- Cotton Swabs or Rags: Roll or dab with a swab or bunched-up fabric to create soft moss effects or subtle highlights on trunks and leaves .
Techniques for Painting Big Trees with Unconventional Brushes
- Base Layer with Broad Strokes: Start with a traditional flat brush to block in the tree’s basic shape—trunk and major foliage areas—using muted browns and greens. This provides a foundation to build upon .
- Texturing the Trunk: Use a palette knife or twig to layer rough, vertical strokes along the trunk. Mix darker shades with lighter highlights to suggest depth and age in the bark .
- Building Foliage: Dab with a sponge or flick with a toothbrush to create clusters of leaves. Work in layers, starting with darker tones underneath and adding brighter greens or yellows on top for a sunlit effect .
- Adding Details: Use cotton swabs or small sticks for finer details like moss, small branches, or light reflections. Keep these touches minimal to avoid overworking the painting .
Tips for Working with Acrylics and Unconventional Tools
- Work Quickly: Acrylics dry fast, so keep a spray bottle of water handy to mist your paint or tools if needed, especially with sponges or rags .
- Layer Strategically: Build texture gradually. Start with thin layers and increase opacity as you go to maintain control over the tree’s form .
- Experiment on Scrap: Test your unconventional tool on scrap paper or canvas first to understand its effect before applying it to your main piece .
- Clean Tools Thoroughly: Non-traditional items can harbor paint in crevices, so rinse them well to avoid color contamination in future sessions .
Final Thoughts
Painting big trees with acrylics offers a chance to blend technical precision with raw creativity, especially when you incorporate unconventional brushes. Tools like sponges, toothbrushes, and twigs can transform your landscapes, infusing them with the wild, untamed spirit of nature. Embrace the unexpected, experiment boldly, and watch your trees grow from mere shapes into commanding presences on your canvas.
Ready to explore more innovative tools and techniques? Check out supplies and inspiration at URARTSTUDIO’s shop and dive deeper into creative painting tips at our painting tips page.
#BigTrees #AcrylicPainting #UnconventionalBrushes #LandscapeArt #URARTSTUDIO
An organized art studio isn’t just about tidiness—it’s about creating a space where creativity can thrive without distraction. For acrylic landscape painters, a well-structured environment can streamline workflows, boost focus, and enhance artistic output. From managing supplies to optimizing your workspace, let’s explore practical strategies to keep your studio in top shape for the best performance.

Why Studio Organization Matters
A cluttered studio can sap inspiration and waste time as you hunt for tools or clear space to paint. An organized space, on the other hand, reduces stress, keeps materials accessible, and allows you to focus on capturing the essence of sweeping landscapes. Think of your studio as an extension of your creative mind—when it’s in order, your ideas flow more freely .
Step 1: Declutter and Define Zones
Start by purging unused or broken items—old brushes, dried-out paints, or sketches you’ll never revisit. Once decluttered, create designated zones for different tasks:
- Painting Area: Keep your easel, canvas, and primary brushes here, with good lighting (natural if possible) to see colors accurately.
- Supply Storage: Store paints, mediums, and spare brushes in labeled drawers or shelves near your painting area for quick access.
- Cleaning Station: Set up a sink or basin area with soap, rags, and jars for brush cleaning to avoid acrylic buildup.
- Inspiration Corner: Reserve a spot for sketchbooks, reference photos, or mood boards to spark ideas without cluttering your workspace .
Step 2: Optimize Tool Accessibility
Efficiency comes from having the right tool at the right moment. Use these storage solutions to keep essentials within reach:
- Brush Holders: Store brushes upright in jars or holders (bristles up) to protect their shape. Separate flats, rounds, and specialty brushes for quick selection.
- Paint Organization: Arrange acrylic tubes or jars by color family on a tiered rack or in clear bins—making it easy to grab that perfect shade for a sunset.
- Palette Setup: Keep a dedicated palette near your easel, with a cover or plastic wrap to prevent drying out between sessions .
Step 3: Manage Space for Workflow
Whether your studio is a spare room or a corner of your home, maximize every inch for functionality:
- Vertical Storage: Use wall-mounted shelves or pegboards for tools and supplies, freeing up floor space for movement.
- Mobile Solutions: Invest in a rolling cart for paints and brushes if you work in multiple spots—it keeps everything portable and organized.
- Clear Surfaces: Maintain a clutter-free worktable or desk for mixing colors or prepping canvases. A clean surface prevents accidental spills or misplaced items .
Step 4: Maintain a Routine for Upkeep
Organization isn’t a one-time task—it’s a habit. Dedicate a few minutes after each painting session to tidy up:
- Clean brushes immediately to avoid acrylic hardening.
- Return supplies to their designated spots.
- Wipe down surfaces to prevent dust or paint buildup that could affect future works .
Essential Items for an Organized Studio
Here’s a quick checklist of tools and systems to enhance your studio setup:
- Storage Bins and Labels: For categorizing paints, papers, and miscellaneous items.
- Brush Cleaners or Jars: To keep bristles in top condition.
- Wall Hooks or Racks: For hanging aprons, rags, or larger tools.
- Lighting Solutions: Adjustable lamps to ensure accurate color perception during late-night sessions .
Final Thoughts
An organized art studio is a powerful ally for acrylic landscape painters, turning chaos into a canvas-ready sanctuary. By decluttering, zoning your space, optimizing accessibility, and maintaining routines, you create an environment that supports peak performance—letting you focus on painting those breathtaking vistas. Start small, adapt these tips to your needs, and watch how a tidy studio transforms your creative process.
Looking for tools to streamline your studio setup? Browse organizational supplies and more at URARTSTUDIO’s shop, and dive deeper into artist tips at our painting tips page.
#ArtStudio #OrganizationTips #AcrylicPainting #LandscapeArt #URARTSTUDIO
The journey of an artist is as much about mindset as it is about technique. While brushes, paints, and canvases are essential tools, it’s the inner world of thoughts, emotions, and perspectives that truly shapes an acrylic landscape painting. Developing an artist mindset—a blend of curiosity, resilience, and vision—can transform challenges into opportunities and elevate your work from mere imagery to profound expression. Let’s explore how to nurture this mindset and unlock your full creative potential.

Embracing a Growth-Oriented Perspective
At the heart of the artist mindset is the belief that skills and creativity can always grow. Unlike a fixed mindset that fears failure, a growth-oriented perspective sees every brushstroke as a chance to learn. Missed a gradient in your sky? Use it as a lesson in blending. Struggling with composition? Experiment until the canvas speaks to you. This approach fosters patience and persistence—key traits for any landscape artist tackling the complexities of nature’s vastness .
Finding Inspiration in the Everyday
Inspiration doesn’t always strike like lightning; often, it’s a quiet whisper in the mundane. Cultivating an artist mindset means training yourself to notice the subtle beauty around you—the way light dances on a lake, the texture of bark after rain, or the muted hues of a foggy morning. Carry a sketchbook or take photos during walks to capture fleeting moments that could become the soul of your next acrylic masterpiece. Over time, this habit of observation sharpens your ability to translate emotion into art .
Overcoming Creative Blocks with Resilience
Every artist faces creative blocks, those frustrating moments when ideas refuse to flow. The artist mindset isn’t about avoiding these hurdles but learning to navigate them. Step away from your canvas—take a walk, listen to music, or meditate to reset your focus. Alternatively, switch to a low-pressure activity like doodling or experimenting with color swatches. Remember, a block is often your mind’s way of asking for a new perspective, not a sign of failure .
The Power of Experimentation
Fear of “ruining” a painting can stifle creativity, but the artist mindset thrives on risk. Acrylics, with their fast-drying nature, are perfect for bold experimentation. Try unconventional color palettes for a sunset, or use a flat brush in unexpected ways to create texture in a forest scene. Each experiment, whether a triumph or a misstep, builds your unique artistic voice. Let go of perfection and embrace the process of discovery .
Building Confidence Through Reflection
Confidence isn’t built overnight; it grows through reflection. After completing a landscape, take time to analyze what worked and what didn’t. Ask yourself: Did the composition convey the mood I intended? How did my brush choices impact the result? Keeping a journal of these reflections helps you track progress and reinforces a mindset of continuous improvement. Over time, this practice turns self-doubt into self-assurance .
Connecting with a Creative Community
Art can be solitary, but an artist mindset benefits from connection. Engage with fellow painters—online or in local groups—to share ideas, seek feedback, and celebrate successes. Seeing how others approach landscapes can spark new ideas and remind you that struggles are universal. A supportive community fosters motivation and reminds you that you’re part of a larger creative tapestry .
Final Thoughts
The artist mindset is a powerful tool, as vital as any brush or palette in your studio. By embracing growth, seeking inspiration, overcoming blocks, experimenting fearlessly, reflecting on your work, and connecting with others, you cultivate a mental space where creativity flourishes. For acrylic landscape painters, this mindset turns rolling hills and vast skies into more than just scenes—they become stories of resilience and imagination.
Ready to deepen your artistic journey? Explore more insights and resources at URARTSTUDIO’s shop and check out additional inspiration on our painting tips page.
#ArtistMindset #Creativity #AcrylicPainting #LandscapeArt #URARTSTUDIO
Creating a captivating acrylic landscape painting hinges on the skillful use of light and shadows. These elements add depth, dimension, and a sense of realism, transforming a flat scene into a dynamic masterpiece. Whether you’re depicting a sunlit valley or a moody forest at dusk, here’s how to harness light and shadows to elevate your artwork.
Understanding the Role of Light and Shadow
Light and shadow work together to define form and create a three-dimensional feel on a two-dimensional canvas. Light highlights the focal points—think of sunlight glinting off a lake—while shadows carve out depth in areas like the underside of trees or mountain crevices. This interplay can evoke emotion, making a landscape feel alive and immersive . For beginners, recognizing a primary light source (e.g., the sun’s position) is key to maintaining consistency across your painting .
Choosing and Mixing Colors for Light and Shadow
To depict light, use lighter, warmer tones of your base color by mixing in white or yellow. For a grassy hill under midday sun, add titanium white to green for sunlit areas. Shadows require cooler, darker shades—blend in blue, purple, or black to suggest depth. A shadowed slope might combine green with a touch of ultramarine blue to mimic the coolness of shade . Experiment with subtle gradations to avoid harsh contrasts unless aiming for dramatic effects like a storm-laden sky .
Layering and Blending Techniques
Acrylics’ fast-drying nature allows for quick layering, ideal for building light and shadow. Start with a mid-tone base layer for your landscape element (e.g., a mountain in medium gray-blue), then add lighter tones where light hits and darker tones in recessed areas. Use a dry brush technique for soft transitions—lightly drag a nearly dry brush to blend light into shadow for a realistic sunset glow . Wet-on-wet blending can also work if applied swiftly before the paint dries, perfect for diffused morning light on a meadow .
Considering Light Direction for Impact
The direction of light dramatically alters a landscape’s mood. A light source from above, like midday sun, creates short, defined shadows under trees or rocks, emphasizing clarity and vibrancy. Side lighting, such as at sunrise or sunset, casts long, dramatic shadows that stretch across the canvas, adding tension and dynamism to rolling hills . Decide your light source early and keep shadow angles consistent—imagine the sun’s position and sketch faint guidelines if needed to track it .
Practical Tips for Dynamic Results
- Contrast is Key: Amplify contrast between light and shadow to draw the viewer’s eye. A brightly lit cliff edge against a deep, shadowed ravine instantly creates focus .
- Atmospheric Perspective: Use lighter, less saturated colors for distant elements under light to suggest depth, while foreground shadows remain bold and dark .
- Test on Scrap: Before applying to your canvas, test light-shadow combinations on scrap paper to perfect your color mixes with acrylics .
Final Thoughts
Using light and shadows effectively in acrylic landscape painting can turn a static scene into a vibrant, dynamic story. By mastering color mixing, layering techniques, and understanding light direction, you’ll breathe life into your landscapes. Practice observing real-world lighting—watch how shadows fall during different times of day—and translate that into your art for stunning results.
Explore quality acrylic supplies to enhance your work at URARTSTUDIO’s shop, and uncover more techniques on our painting tips page.
#LightAndShadow #AcrylicPainting #LandscapeArt #PaintingTechniques #URARTSTUDIO
Unlock Precision and Finesse in Your Acrylic LandscapesWhen it comes to capturing those fine, intricate details that bring a landscape painting to life, the rigger brush is a tool that stands out for its unique capabilities. Originally designed for painting ship rigging—hence the name—the rigger brush is appreciated by artists of all levels for its exceptional control and ability to create smooth, continuous lines. In this article, we’ll uncover the distinct advantages of using a rigger brush for detail work and explore techniques that can elevate your acrylic landscapes from good to unforgettable.What Makes the Rigger Brush Unique?Rigger brushes are characterized by their long, thin bristles, which come to a precise point. This design allows artists to load the brush with enough paint to produce lengthy, unbroken lines, while maintaining consistent width and sharpness throughout each stroke. The flexibility and springiness of the bristles offer a perfect balance between flow and control, making the rigger brush ideal for a variety of fine-detail applications.Key Benefits of the Rigger Brush in Detail Work1. Unmatched Control for Fine LinesThe rigger brush excels at painting ultra-fine lines—think blades of grass, branches, distant tree lines, or fencing wires. Its elongated shape makes it easy to guide, ensuring your lines are both delicate and confident.2. Consistent, Fluid StrokesUnlike shorter-bristled liners, the rigger’s extended tip holds more paint and releases it gradually. This feature means you can create long, continuous strokes without constantly reloading the brush—a major advantage for painting river reeds, tall grasses, or the delicate rigging on boats.3. Intricate Detailing and EmbellishmentsFor finishing touches such as highlighting edges, sketching tree bark, or adding tiny accents to water reflections, the rigger offers high precision with minimal risk of smudging or overworking areas.4. Versatility Across TechniquesWhether you use it with thin washes or thicker paint, the rigger adapts beautifully. It’s also useful for calligraphic effects, subtle texturing, or even signing your artwork with a steady, elegant signature.Essential Techniques for Getting the Most from Your Rigger Brush1. Proper Loading and Paint Consistencycontinue reading: https://urartstudio.com/exploring-the-world-of-promise-the-benefits-of-using-a-rigger-brush-in-detail-work/#riggerbrush #detailpainting #acryliclandscapepainting #arttips #URARTSTUDIO
Ignite Your Acrylic Landscapes with Innovation and Imagination
In landscape painting, mastery often starts with the tried-and-true—broad washes with flats, delicate details with liners, lush canopies with filberts. But if you crave artwork that feels fresh and uniquely your own, the path lies in blending tradition with experimentation. By merging classic brushwork with unconventional tools and approaches, artists can unlock a world of creative possibility that goes far beyond what’s found in standard painting guides.Why Combine Classic and Creative Brushwork?Push Your Boundaries, Transform Your ArtTraditional brushes—flat, round, filbert, and fan—give you a solid foundation in control, mark-making, and textural variation. However, introducing non-traditional tools or unexpected techniques shakes up established habits, letting you discover new effects, serendipitous textures, and dynamic energy within your work. The synergy of old and new is where artistic growth truly accelerates!Traditional Tools: The Essentials to Build OnYour Core Kit for Reliable ResultsBegin by establishing the main forms and structure of your landscape with foundational brush types:Flat brushes: Lay down strong backgrounds and defined edges.Round brushes: Add linework, branches, and fine details.Filbert brushes: Ideal for soft blending and subtle transitions in skies or meadows.Fan brushes: Create natural, massed textures for foliage or grassy fields.With these traditional tools, you can confidently block in shapes and develop the overall “road map” of your painting.Unconventional Tools: Spark Unexpected InspirationBreaking the Mold for Stand-Out Texture and EffectsMove beyond the standard brush rack with items you’ll find in any art drawer or around the house. Unconventional tools introduce randomness, organic marks, and personal flair to your landscapes:Old credit cards or palette knives: Swipe for bold, scraping effects—excellent for rock faces, bark, or water reflections.Natural sponges: Dab for organic clouds, leafy canopies, or mottled terrain.Toothbrushes: Splatter fine mist, rain, or distant field textures with a simple flick.Combs or hair picks: Drag through wet paint to mimic tall grass, furrows in the earth, or tree bark.Paper towels or cloth: Smudge, lift, or blend paint for fog, sunlight, or soft water edges.Bubble wrap or plastic film: Press into wet paint for quirky, abstract surface motifs—perfect for pebbles, foliage, or flower beds.Merging Methods: Step-by-Step for Dynamic LandscapesHow to Layer the Best of Both WorldsContinue reading: https://urartstudio.com/creative-brush-techniques-merging-traditional-methods-with-unconventional-tools/#creativebrushtechniques #acryliclandscapepainting #paintinginnovation #unconventionaltools #artsupplies #URARTSTUDIO
Unlocking Creativity with the Right Tools at URARTSTUDIO
Acrylic landscape painting is an art form that invites endless exploration; every brushstroke reveals possibility, every texture unlocks a new world of color and light. At URARTSTUDIO, our mission is to guide artists of every level with free, step-by-step acrylic painting tutorials, expert painting advice, and high-quality art supplies specifically curated to elevate your craft.
Among all art tools, paintbrushes reign supreme in their ability to shape your creative vision. The shape and style of your brush can dramatically influence your artwork, affecting everything from the mood and realism of your landscape to the executable details and textural complexity. In this comprehensive guide, we’ll reveal how brush selection—flat, round, filbert, fan, and more—impacts the landscape painting process and how you can utilize these unique tools for mesmerizing effects in your art.
The Foundation: Understanding Brush Anatomy for Acrylic Landscape Artists
Why Brush Shape Matters
Every acrylic artist knows that not all brushes are created equal. Beyond size, the shape, bristle length, and tip design are key factors that determine mark-making potential. Whether you’re capturing the delicate shimmer of a waterfall or the rough texture of distant mountains, your brushes become the extension of your expressive intent.
Types of Paintbrushes and Their Effects in Landscape Art
Flat Brushes: Building Bold Strokes and Crisp Edges
Flat brushes, with their straight, squared-off bristles, are invaluable for acrylic landscapists. Their versatility shines in creating everything from broad strokes for skies to sharp, architectural lines for tree trunks or distant fences. When loaded with color, a flat brush can spread washes across the canvas or define the crisp horizon line where land meets sky.
Pro tips from URARTSTUDIO:
Use flat brushes for blocking in the background, painting large grassy fields, and forming the perspective lines of rivers or shorelines. Try using the edge for fine details and the flat side for blending larger areas.
Round Brushes: Perfecting Details and Swift Gestures
Round brushes feature a pointed tip and a rounded body, ideal for precise details, graceful lines, and organic elements in your landscape. Their shape allows for both delicate detail—like individual blades of grass—and gestural flicks representing reeds or twigs.
Pro tips from URARTSTUDIO:
Reach for a round brush when painting flowers, tree branches, or ripples on water. Vary your pressure to shift easily from thick to thin lines, and experiment with loading multiple colors for lively, variable marks.
Filbert Brushes: Softening Shapes and Blending Skies
With an oval, softly tapered tip, filbert brushes excel at blending and making rounded, organic forms. These brushes bridge the gap between flats and rounds, allowing you to both layer color and softly blend hues—a vital function in painting fluffy clouds, rolling hills, or the gentle curves of leaves and rocks.
Pro tips from URARTSTUDIO:
Use filberts for painting soft-edged shapes like cumulus clouds, tree tops, or reflected sunlight. The curved tip also makes it perfect for painting flower petals or gently blending distant backgrounds.
Fan Brushes: Creating Natural Textures and Dynamic Effects
Fan brushes are distinguished by their fanned, spread-out bristles, which are perfect for stippling and creating textures that emulate nature. They can capture the look of grass, foliage, and even create the illusion of shimmering water or wind-rippled fields with a few light touches.
Pro tips from URARTSTUDIO:
Dip the fan brush into two colors for a natural, variegated effect. Use quick taps to build up the foliage of a tree or gentle, side-to-side flicks for field grass and reflections on a pond. Clean your fan brush frequently to avoid muddling colors!
Angle and Detail Brushes: Precision Work for Finishing Touches
Angle (or angular) brushes, with their slanted bristle tip, offer maximum control for sharp edges and corners—ideal for painting rocks, building edges, or close-up foliage. Detail brushes, which are small and finely tipped, grant pinpoint precision for adding highlights, fine branches, and final details that make your landscape pop.
Pro tips from URARTSTUDIO:
Use angle brushes for working around masked regions, tight corners, or painting roofs and edges. Save your smallest detail brushes for the finishing touches that define the character of your landscape—like sparkling highlights on water or the detail in a bird’s silhouette on the horizon.
Bridging Technique and Creativity: Pairing Brush Shape with Acrylic Techniques
Blending, Dry-brushing, and Impasto—Made Better with the Right Brush
Matching your technique to the ideal brush shape can significantly enhance your results in acrylic landscape painting. For blending soft gradients in evening skies, filberts and large flats work wonders. For rough texture and expressive marks, use stiff hog-bristle flats or fans to dry brush and capture rocky cliffs or tree bark.
A combination of brush shapes on your palette not only increases your textural vocabulary but also lets you transition seamlessly from broad backgrounds to intricate highlights and details. This harmony of tools enables your unique artistic vision to flourish across the canvas.
URARTSTUDIO’s Signature: Unique and Unconventional Brushes for Inspired Landscapes
Stepping Beyond the Ordinary
At URARTSTUDIO, our curated selection of brushes is designed to empower, not restrict. We pride ourselves on offering unique, unconventional brushes you won’t find elsewhere—innovative shapes for adventurous artists looking to break boundaries in their landscape paintings. Whether it’s extra-large fans, specialty textures, or multi-bristle blends, our collection is made for artists who, like you, want every painting to stand out.
Visit our online shop to explore these one-of-a-kind tools and begin expanding your brush collection today.
Beyond Brushes: Virtual Gallery, Step-by-Step Tutorials, and Original Art
Your Complete Creative Hub
Ready to put your new brush knowledge to work? Dive into our extensive archives of free, step-by-step acrylic painting instructions and painting tips, all accessible at URARTSTUDIO. Immerse yourself in our Virtual Gallery, where you can display your latest masterpiece and see how it fits in a real room setting. Want to own a signature piece? Our original paintings gallery offers you the chance to purchase artwork featured in our popular YouTube painting demonstration videos.
We believe that everyone has the potential to create breathtaking landscapes—no matter where they are on their artistic journey. Our community is here to support you with expertise, resources, and inspiration every step of the way.
Conclusion: The Right Brush Shape Unlocks Your Unique Artistic Voice
Mastering the art of acrylic landscape painting begins with understanding your tools. The right brush shape—when paired with solid technique—lets you capture the light, atmosphere, and textures that transform a simple scene into a moving work of art. At URARTSTUDIO, we’re dedicated to supplying you with quality resources, innovative brushes, and the knowledge to bring your vision to life.
Ready to elevate your paintings even further?
Browse our unique selection of art supplies, discover valuable painting tips, and follow comprehensive step-by-step painting instructions available now at urartstudio.com. Expand your creative toolkit and embrace new artistic possibilities with every brushstroke!
Keywords: paintbrush shapes, acrylic landscape painting, art supplies, landscape painting techniques, painting tutorials, URARTSTUDIO
#paintbrushshapes, #acryliclandscapepainting, #artsupplies, #landscapepaintingtechniques, #paintingtutorials, #URARTSTUDIO
Approaching Night https://youtu.be/9RlljYJPMdM
* Brushes - https://urartstudio.com/product-category/art-supply/brushes/
* COLORS - violet, white, yellow, burnt umber, vandyke brown
Immerse yourself in the enchanting world of landscape art with URARTSTUDIO's step-by-step painting tutorial, "Approaching Night: Landscape Art | Oval Brush Technique | Easy Painting for Beginners." Join us on a mesmerizing artistic journey as we paint the breathtaking beauty of a twilight scene. Experience the joy of creating stunning landscapes with easy-to-follow instructions and learn the elegant oval brush technique that adds a touch of magic to your artwork. Unleash your inner artist and let "Approaching Night" inspire you to create captivating masterpieces. Prepare to be amazed at urartstudio.com, where creativity knows no bounds and artistic dreams come to life.
* SHARE YOUR ART - https://www.facebook.com/groups/shareyourart1
* MEMBERSHIP - https://www.youtube.com/channel/UC3hCdJZXe9k52K6FIzUBLeA/join
* ARTIST NOTES - https://urartstudio.com/artist-notes/
#EnchantingTwilight
#StepByStepArtTutorial
#OvalBrushMagic
#CaptivatingLandscapes
#ArtisticDreamsComeTrue
#UnleashYourCreativity
Step into the enchanting world of acrylic landscape painting and let your creativity soar as you embark on a journey of capturing the beauty of nature. Whether you're a novice artist or someone looking to explore a new artistic endeavor, this article aims to provide you with tips, advice, and encouragement to help you master the art of acrylic landscape painting.
1. Start with Simple Subjects:
As a beginner, it's best to start with simpler landscape subjects that feature fewer intricate details. Begin by portraying serene sunsets, gentle rolling hills, or peaceful lakes. This will allow you to focus on mastering the basic techniques and elements before gradually progressing to more complex landscapes.
2. Study Light and Shadows:
Understanding the effects of light and shadows is crucial in creating realistic and compelling landscapes. Observing the play of light across different times of the day and in various weather conditions will help you grasp how shadows define form and create depth. Experiment with different sources of light to add drama and dimension to your acrylic landscape paintings.
3. Play with Texture:
Acrylic paints allow for versatile texture creation on the canvas. Incorporate various techniques such as dry brushing, palette knife work, or even adding texture gel to simulate natural elements like rocks, foliage, or water. Texture adds interest and tactile appeal to your artwork, making it visually captivating.
4. Master the Art of Color Mixing:
Acrylic paints offer an extensive range of colors, allowing you to create vibrant and expressive landscapes. Spend time understanding color theory and practice mixing different hues, tints, and shades. Experiment with complementary and analogous color schemes to evoke specific moods and emotions in your paintings.
5. Employ Perspectival Techniques:
Creating a sense of depth in your acrylic landscapes can be achieved through the use of perspectival techniques such as linear perspective or aerial perspective. Understand how objects appear smaller and less detailed in the distance, and use this knowledge to give your paintings a realistic and immersive feel.
6. Use Reference Photos and Sketches:
Reference photos and sketches can serve as valuable references for composition, proportions, and capturing specific details in your landscapes. Take your own photographs or utilize resources available online. Sketching your ideas beforehand will help you plan your composition and create a roadmap for your painting.
7. Practice and Patience:
Remember that becoming proficient in acrylic landscape painting takes practice and patience. Embrace each painting session as an opportunity to learn and improve. Don't be discouraged by initial setbacks or imperfect results. Every stroke of the brush brings you closer to mastering this beautiful art form.
Acrylic landscape painting offers a wonderful avenue for artistic expression and a deep connection to nature. By starting with simple subjects, studying light and shadows, playing with texture, mastering color mixing, employing perspectival techniques, and using references, you will begin to create stunning landscapes on canvas. Remember to embrace the process, practice with dedication, and allow your creativity to flourish. For further inspiration and guidance, we invite you to visit our website at UrArtStudio (https://urartstudio.com), where you'll find a vibrant community and additional resources to help you on your artistic journey. Let the beauty of nature inspire you as you explore the glorious world of acrylic landscape painting.
Welcome to the captivating world of acrylic landscape painting! This blog post is designed to ignite your passion for art and provide you with essential tips, advice, and encouragement as you embark on your creative journey. Let's dive into the enchanting realm of acrylic landscapes and discover the transformational power of painting nature on canvas.
1. Immerse Yourself in Nature's Beauty:
To create breathtaking landscape paintings, immerse yourself in the beauty of the natural world. Take leisurely walks, go on adventures, and witness the ever-changing scenery around you. Observe the intricate details, the interplay of light and shadow, and the vivid colors that make landscapes so mesmerizing. Let these experiences fuel your creativity and inspire your artistic endeavors.
2. Develop Your Observation Skills:
The art of landscape painting is as much about observation as it is about technique. Train your eyes to notice the subtle nuances of nature. Pay attention to the way light dances on the leaves, the texture of tree barks, and the reflection of the sky on serene lakes. The more you observe, the better equipped you'll be to capture these details on your canvas.
3. Express Your Unique Perspective:
While nature provides inspiration, your perspective is what makes your artwork truly special. Don't be afraid to infuse your paintings with your own emotions, memories, and interpretations. Experiment with different compositions, angles, and color palettes to create a visual narrative that speaks to your inner artist. Trust your instincts and let your creativity flow.
4. Embrace the Versatility of Acrylics:
Acrylic paints are a versatile medium that offer endless possibilities for experimentation. They can be layered, diluted, and manipulated to achieve a variety of effects. Explore different techniques, such as creating texture with impasto or using glazes to add depth. Embrace the boldness and vibrancy of acrylics as you bring your landscapes to life.
5. Learn from Other Artists:
Art is a continuous learning process, and there is much to gain from the wisdom and experiences of fellow artists. Seek inspiration from renowned landscape painters, study their techniques, and analyze their compositions. Join art communities, attend workshops, and engage in constructive discussions to expand your knowledge and gain valuable insights.
6. Practice Patience and Persistence:
Acrylic landscape painting, like any form of art, requires patience and persistence. Don't become disheartened by initial setbacks or compare your work to others. Painting is a personal journey, and every stroke brings you closer to improvement. Embrace the learning process, celebrate small achievements, and remember that growth takes time.
Congratulations on embarking on the magical and transformative journey of acrylic landscape painting! By immersing yourself in the beauty of nature, honing your observation skills, expressing your unique perspective, exploring the versatility of acrylics, learning from other artists, and practicing patience, you are well on your way to mastering this awe-inspiring art form. So, grab your paintbrush, embrace the possibilities, and let your imagination run wild on the canvas. To further nurture your artistic growth, we invite you to visit our website at UrArtStudio (https://urartstudio.com), where you'll find a supportive community and additional resources to fuel your creativity. May your acrylic landscape paintings transport viewers to the serene beauty of nature and evoke emotions that words cannot express. Happy painting!
Interesting Painting Fact: "The Mona Lisa's Smile: The Enigma That Captivates the World"
The enigmatic smile of Leonardo da Vinci's famous masterpiece, the Mona Lisa, has been the subject of fascination for centuries. What makes it even more captivating is the artist's technique of using a painting style called sfumato.
Sfumato, derived from the Italian word "sfumare," meaning "to tone down" or "to evaporate," involves subtly blending tones and colors together to create soft transitions and a hazy, almost smoky effect. Leonardo da Vinci employed this technique to achieve the delicate gradations of light and shadow that give the Mona Lisa her mysterious and intriguing smile.
The subtle smudging and blending of colors through sfumato give the painting an ethereal quality, blurring the lines between reality and imagination. This technique adds depth and a sense of atmosphere to the artwork, making it appear alive and almost glowing.
Today, the Mona Lisa remains one of the most iconic and widely recognized artworks in the world, in large part due to the enduring enigma of her smile. The painting continues to captivate viewers, sparking both admiration and countless interpretations, all while highlighting the mastery and genius of Leonardo da Vinci.
So, the next time you gaze upon the Mona Lisa, take a moment to appreciate the skillful use of sfumato and how it contributes to the enigma and allure of one of the art world's most celebrated treasures.
Experiment with Different Mediums and Techniques:
As a beginner artist, it's important to explore various mediums and techniques to find what resonates with you. Don't limit yourself to just one type of paint or style of painting. Experimentation leads to discovery and growth. Here's some advice to encourage your artistic exploration:
1. Try Different Mediums: Venture beyond traditional oil or acrylic paints. Experiment with watercolors, gouache, pastels, or even mixed media. Each medium has its own unique properties and ways of interacting with the canvas or paper. Exploring different mediums will not only expand your technical skills but also allow you to express your creativity in diverse ways.
2. Test a Variety of Brushes and Tools: Brushes come in various shapes, sizes, and materials, each creating a different effect on the canvas. Try using different types of brushes, palette knives, sponges, or even unconventional tools like credit cards, toothbrushes, or bristle brushes. Explore how different tools can create varied textures, strokes, and patterns.
3. Embrace Different Techniques: Experimenting with different techniques can push your boundaries and enhance your artistic style. Explore techniques such as glazing, impasto (thick application of paint), dry brushing, splattering, or wet-on-wet. Each technique adds a unique visual element to your artwork and allows you to achieve a range of effects and textures.
4. Study Art History: Delve into the works of famous artists from different eras and art movements. Studying their techniques and styles can inspire and influence your own artistic approach. Analyze their brushwork, color choices, and composition to gain insights into their creative processes. By understanding the foundations of art history, you can discover new ways to interpret and express your own ideas.
5. Step Outside Your Comfort Zone: Don't be afraid to take risks and step outside your artistic comfort zone. Challenge yourself by attempting subjects or styles that you find intimidating. Pushing your boundaries fosters personal growth and innovation. Remember, even if the result isn't perfect, the process of exploration and pushing your limits will lead to valuable insights and artistic development.
6. Learn from Others: Join art communities, attend workshops, or take online courses to learn from experienced artists and fellow enthusiasts. Engage in constructive critique sessions to gain valuable feedback on your work. Learning from others can inspire you, expose you to new techniques, and provide a supportive network for your artistic journey.
Remember, art is a personal and subjective form of expression. Embrace experimentation, give yourself permission to make mistakes, and enjoy the journey of self-discovery through paint and canvas.
For further inspiration, tips, and resources, visit our website at https://urartstudio.com by UrArtStudio. We offer a wealth of free painting tips, step-by-step instructions, art video tutorials, unconventional paint brushes, and more to support and inspire artists at every level. Unleash your creativity, explore different mediums and techniques, and let your imagination guide your artistic endeavors.
Unleash Your Imagination: Create a Surreal Self-Portrait
Are you ready to embark on a creative journey that combines reality with imagination? Let's delve into the realm of surrealism with a fascinating painting idea: a surreal self-portrait. It's an opportunity to express your inner thoughts, dreams, and emotions in a visually captivating and thought-provoking way. Here's a step-by-step guide to help you bring your surreal self-portrait to life:
Step 1: Self-Reflection and Concept Development
Take a moment for self-reflection and explore the themes, emotions, or ideas you want to convey through your self-portrait. Consider incorporating symbolic elements or objects that hold personal significance. Brainstorm and sketch out different ideas, allowing your imagination to run wild.
Step 2: Composition and Background
Think about the composition of your self-portrait. Do you envision a dreamy landscape, an abstract environment, or a surreal setting? Select colors, shapes, and textures that amplify the mood you want to evoke. Experiment with unconventional perspectives or proportions to add an otherworldly touch to your piece.
Step 3: Surreal Elements and Symbolism
Introduce surreal elements into your self-portrait to create an imaginative narrative. These can be symbolic objects, unexpected juxtapositions, or fantastical creatures. Consider the hidden meanings behind these elements and how they contribute to the overall story you want to tell about yourself.
Step 4: Expressive Self-Portraiture
Focus on capturing your own likeness in a unique and expressive way. Pay attention to facial expressions, body language, and use of color to convey your emotions or inner world. Don't be afraid to exaggerate features or blur the boundaries between reality and fantasy.
Step 5: Textures, Textiles, and Patterns
Enhance the visual impact of your self-portrait by incorporating textures, textiles, or patterns. Experiment with different painting techniques, such as impasto for added dimensionality or glazing for ethereal effects. Incorporate intricate patterns or fabrics that reflect your personality or cultural influences.
Step 6: Final Touches and Details
Refine your artwork by adding intricate details and fine-tuning the overall composition. Pay attention to lighting and shadows to create depth and realism. Step back periodically to assess your work from a distance and make necessary adjustments to achieve the desired impact.
Remember, this is your personal and imaginative journey. Allow yourself to embrace the unexpected, take risks, and enjoy the process of creating something truly unique. Don't forget to visit our website at https://urartstudio.com by UrArtStudio for more free painting tips, step-by-step instructions, art video tutorials, unconventional paint brushes, and a wealth of resources to support your artistic exploration. Unleash your imagination, and let your surreal self-portrait come to life on the canvas!
Discover the Golden Ratio: The Aesthetic Secret of Masterpieces
Did you know that many famous artworks throughout history have been influenced by a mathematical concept called the Golden Ratio? This intriguing proportion, often represented by the symbol φ (phi), has been celebrated for its aesthetically pleasing and harmonious qualities. Let's explore this fascinating painting fact and its impact on the world of art:
The Golden Ratio, approximately 1.6180339887, is a mathematical ratio derived from the Fibonacci sequence—a series of numbers where each number is the sum of the two preceding ones (e.g., 1, 1, 2, 3, 5, 8, 13, and so on). This ratio has been revered for its balance and pleasing aesthetic appeal, as it appears frequently in nature and art.
Throughout history, renowned artists like Leonardo da Vinci, Michelangelo, and Salvador Dalí, among others, recognized the significance of the Golden Ratio in creating visually compelling compositions. They employed this ratio to determine the ideal placement of focal points, lines, and shapes within their artworks.
The Golden Ratio is often applied in the arrangement of elements in a painting, such as the placement of the horizon line, the positioning of key subjects, or the ratio of the height and width of the canvas. By using the Golden Ratio, artists aim to create balance, symmetry, and an inherent sense of visual harmony that captivates the viewer.
Beyond its influence on individual artistic compositions, the Golden Ratio has also shaped the design and structure of entire artworks and architectural masterpieces. Examples include the Parthenon in Athens, the Pyramids of Egypt, and even modern architectural wonders like the Guggenheim Museum in New York City.
Exploring the Golden Ratio can add a fascinating dimension to your artistic journey. By incorporating this proportion into your compositions, you can experiment with creating visually captivating works that evoke a sense of underlying harmony and proportion.
To delve deeper into the world of art and uncover more fascinating painting facts, we encourage you to visit our website at https://urartstudio.com by UrArtStudio. Our platform offers a wealth of resources, including free painting tips, step-by-step instructions, art video tutorials, unconventional paint brushes, and more. Discover the secrets that lie behind masterpieces, unlock your artistic potential, and let the Golden Ratio guide your creative endeavors!
Harness the Power of Value: Creating Depth and Dimension
One powerful painting tip for artists of all levels is to pay attention to the concept of value. Value refers to the relative lightness or darkness of colors and is crucial in creating depth, dimension, and realistic representations in your artworks. Here's how you can harness the power of value in your paintings:
1. Understand the Value Scale: Familiarize yourself with a value scale, which is a range of shades from pure white to pure black. Practice creating smooth transitions between different values and identify the subtle variations within each step. This exercise will help you develop a discerning eye for values within your subject matter.
2. Study Light and Shadow: Observe how light interacts with objects and surfaces in the real world. Look for highlights, mid-tones, and shadows. Understanding how light affects form and creates contrast will enable you to render objects convincingly and give your paintings a sense of depth.
3. Establish a Light Source: Imagine a consistent light source in your artwork, and consistently apply its effects on your objects or figures. This will help you determine where highlights and shadows should appear and maintain a cohesive lighting scheme throughout your painting.
4. Utilize Contrast: Incorporate a range of values in your compositions to create visual interest. Contrast between light and dark areas can draw the viewer's eye and add drama and impact to your artwork. Experiment with extreme contrasts for bold, striking effects, or subtle gradations for a softer, more nuanced mood.
5. Simplify Complex Forms: When confronted with complex subjects, simplify their forms into their basic value patterns. Identify the main areas of light and shadow and block them in first. This simplification will give you a solid foundation to work from and make the painting process more manageable.
6. Squint Your Eyes: Squinting at your subject matter or your work-in-progress can help you see the broader value patterns more clearly. By reducing details and focusing on the overall light and dark shapes, you can better evaluate the overall composition and ensure that your values are effectively conveying the desired depth and dimension.
Remember, value is as important as color in creating a visually compelling artwork. By understanding and effectively utilizing value, you can enhance the three-dimensionality of your paintings, evoke mood and atmosphere, and bring your subjects to life.
For more painting tips, step-by-step instructions, art video tutorials, unconventional paint brushes, and additional resources, be sure to visit our website at https://urartstudio.com by UrArtStudio. Our platform is dedicated to supporting artists like you in your artistic journey, offering a wealth of inspiration and educational materials to help you grow and refine your skills. Embrace the power of value and elevate your paintings to new heights!
Mastering Color Harmony: Enhancing Your Artistic Expression
Color is a powerful tool that can evoke emotions, convey moods, and bring your artwork to life. To create visually captivating and harmonious compositions, mastering color harmony is key. Here are some tips to help you enhance your artistic expression through color:
1. Understand the Color Wheel: Familiarize yourself with the color wheel, a circular diagram that organizes colors in a logical and harmonious order. Learn about primary colors (red, blue, and yellow), secondary colors (orange, green, and purple), and tertiary colors (combinations of primary and secondary colors). Understanding how colors relate to each other on the color wheel will guide your color choices.
2. Explore Color Schemes: Experiment with various color schemes to evoke different moods and atmospheres in your artwork. Some popular schemes include complementary (colors opposite each other on the color wheel), analogous (colors next to each other), and monochromatic (variations of a single color). Each scheme creates a distinct visual impact, so choose one that complements your desired artistic intent.
3. Consider Color Temperature: Colors can be categorized as warm (reds, oranges, yellows) or cool (blues, greens, purples). Understanding color temperature and how it influences perception is crucial. Warm colors tend to create a sense of energy, vibrancy, or warmth, while cool colors convey calmness, tranquility, or a sense of distance. Use this knowledge to evoke the desired mood or atmosphere in your artwork.
4. Create a Focal Point: Utilize color to guide the viewer's eye and highlight important elements or areas within your composition. Through color contrast, you can emphasize a focal point, making it visually compelling and engaging. Ensure that the focal point stands out by using contrasting colors, whether in value, saturation, or both.
5. Experiment with Color Harmonies: Play with various color harmonies to create unique and visually captivating effects. Try split-complementary (a main color and the two colors adjacent to its complement), triadic (three colors equally spaced on the color wheel), or tetradic (two sets of complementary colors) harmonies. These combinations can add intrigue and visual interest to your artwork.
6. Use Color Symbolism: Colors often carry symbolic meaning and cultural associations. Consider the emotional and psychological impact different colors can have on viewers. For example, red can signify passion or danger, while blue can evoke calmness or sadness. Use color symbolism intentionally to enhance the narrative or convey specific messages in your artwork.
By understanding how colors interact, utilizing color schemes, and playing with contrast and symbolism, you can elevate your artistic expression and create visually captivating compositions. For more painting tips, step-by-step instructions, art video tutorials, unconventional paint brushes, and additional resources, visit our website at https://urartstudio.com by UrArtStudio. Our platform offers a wealth of inspiration and educational materials to support your artistic growth and exploration. Let color be your ultimate tool for evoking emotions and expressing your unique artistic voice.
Unleash Your Inner Creativity: Embrace the Joy of the Process
One essential painting advice for finding motivation is to embrace the joy of the process and tap into your inner creativity. Here's some guidance to help you stay motivated and inspired:
1. Set Realistic Goals: Start by setting achievable goals for your painting practice. Break down larger goals into smaller, manageable milestones. Celebrate each accomplishment along the way, as this will keep you motivated and give you a sense of progress.
2. Find Inspiration Everywhere: Seek inspiration from various sources, including nature, art exhibitions, books, music, or even everyday life. Surround yourself with things that ignite your imagination and spark your creativity. Let these influences inspire new ideas and approaches in your artwork.
3. Experiment and Explore: Don't be afraid to step outside your comfort zone and try new techniques, mediums, or subjects. Experimentation opens doors to unexpected discoveries and can help you find your unique artistic voice. Embrace challenges and see them as opportunities for growth.
4. Practice Consistently: Dedicate regular time to painting, even when you don't feel particularly motivated. Consistency is key to improving your skills and deepening your connection with your art. Establish a routine that works for you and make painting an integral part of your daily or weekly schedule.
5. Seek Community and Support: Connect with fellow artists, either online or in person, to share experiences, seek feedback, and encourage each other. Join art groups, forums, or workshops where you can engage with like-minded individuals and draw inspiration from their journeys.
6. Embrace Mistakes and Learn from Them: Remember that mistakes are a natural part of the artistic process. Don't be discouraged by setbacks; instead, view them as valuable learning opportunities. Embrace the unexpected outcomes and see how they can lead you to new artistic directions and breakthroughs.
7. Celebrate Your Progress: Take time to reflect on how far you've come in your artistic journey. Look back at your early works and compare them to your current pieces. Recognize and celebrate the growth and improvement you've achieved. This reflection can serve as a powerful motivator and inspire you to keep pushing your boundaries.
Remember, painting is a personal expression of your creativity and passion. Allow yourself the freedom to enjoy the process without solely focusing on the end result. For further motivation, inspiration, and valuable resources, visit our website at https://urartstudio.com by UrArtStudio. Our platform offers a wealth of painting tips, step-by-step instructions, art video tutorials, unconventional paint brushes, and more to support and inspire you on your artistic journey. Embrace the joy of creating and unleash your inner creativity!
Tip: The Medium is a Message - Embrace the Power of Artistic Mediums
When creating art, it's essential to recognize that the choice of medium itself carries meaning and can greatly influence the message you convey. Here's a valuable tip to help you understand and harness the power of artistic mediums:
Explore Different Mediums: Experiment with a variety of artistic mediums such as oils, acrylics, watercolors, charcoal, pastels, or even digital tools. Each medium possesses unique characteristics and qualities that can evoke different emotions and create distinct visual effects. By exploring different mediums, you can find the one that best aligns with your artistic vision and the message you wish to communicate.
Consider Symbolism: Certain mediums carry inherent symbolism. For example, oil paints have a rich history and association with traditional masterpieces, while watercolors often evoke a sense of lightness and transparency. Think about how your chosen medium can enhance or convey the themes and emotions you want to express in your artwork.
Experiment with Mixed Media: Don't be afraid to combine multiple mediums in a single artwork. Mixed media art allows you to blend different materials and techniques, creating unique textures, layers, and visual surprises. This interdisciplinary approach can add depth and complexity to your message, allowing it to be interpreted in diverse ways.
Match the Medium with the Message: Each medium has its strengths and limitations. Consider how the characteristics of a particular medium can enhance or align with the concept or subject matter you're exploring. For instance, the bold, vibrant colors of acrylics could be well-suited for a lively, energetic composition, while the soft, subtle tones of watercolors might be perfect for capturing a delicate and dreamlike scene.
Experiment and Push Boundaries: Don't be afraid to push the boundaries of traditional mediums. Explore unconventional applications, techniques, or combinations of materials. Embrace innovative approaches and let your creativity guide you to new possibilities that challenge conventional norms and expand the expressive potential of your artworks.
Remember, the medium you choose communicates just as much as the subject matter and composition of your artwork. By embracing different artistic mediums, considering their symbolism, experimenting with mixed media, and aligning the medium with your message, you can create powerful and thought-provoking art. Expand your horizon by visiting our website at https://urartstudio.com by UrArtStudio, where you'll find further painting tips, step-by-step instructions, art video tutorials, unconventional paint brushes, and additional resources to explore the endless possibilities of artistic mediums. Let the medium become an integral part of your artistic narrative, captivating viewers and conveying your message with profound impact.
Tip: Find Inspiration in Everyday Life
As an artist, inspiration can be found in the seemingly mundane aspects of everyday life. Here's a valuable tip to help you discover beauty and creativity around you:
Practice Mindful Observation: Train yourself to be mindful and present in your surroundings. Slow down and take notice of the intricate details and moments that often go unnoticed. Pay attention to the interplay of light and shadow, the patterns in nature, the expressions on people's faces, or the textures of objects. By cultivating a keen sense of observation, you'll uncover a treasure trove of inspiration in the world around you.
Keep a Visual Journal: Carry a sketchbook or use a smartphone to capture visual snippets of the things that capture your attention. Whether it's a quick sketch, a photograph, or a written description, document these moments and ideas in your visual journal. This practice allows you to revisit and draw inspiration from your observations at a later time when starting new artworks.
Explore Different Environments: Break away from your usual settings and explore different environments. Visit parks, museums, cafes, or bustling city streets. Surround yourself with diverse sights, sounds, and experiences. By immersing yourself in new environments, you'll expose yourself to fresh perspectives and spark your imagination.
Find Beauty in the Ordinary: Train yourself to find beauty and intrigue in everyday objects and scenarios. Transform familiar objects or overlooked scenes into extraordinary subjects in your artwork. Whether it's a stack of books, a simple flower in a vase, or the play of light on a mundane street corner, seek out the extraordinary in the ordinary, and let it inspire your creative expression.
Experiment with Different Artistic Styles: Don't limit yourself to a single artistic style or approach. Explore different techniques, styles, and mediums to bring variety and freshness to your artworks. Try incorporating elements of realism, impressionism, abstraction, or any other style that resonates with you. Experimentation allows for growth and keeps your creative journey exciting and dynamic.
Remember, your surroundings are teeming with inspiration waiting to be discovered. Embrace mindful observation, maintain a visual journal, venture into new environments, find beauty in the ordinary, and experiment with different artistic styles. By seeking inspiration in everyday life, you'll infuse your artwork with authenticity, personal meaning, and a unique perspective. For more artistic resources and guidance, visit our website at https://urartstudio.com by UrArtStudio, where you'll find additional painting tips, step-by-step instructions, art video tutorials, unconventional paint brushes, and a wealth of inspiration to nurture your creative spirit. Open your eyes and let the world around you ignite your artistic passion!
Tip: Master the Art of Hanging Art Paintings
Hanging art paintings is not just about finding an open spot on the wall and putting up a nail. It requires careful consideration of placement, aesthetics, and proper techniques to showcase your artwork to its fullest potential. Here are some best tips to help you master the art of hanging art paintings:
1. Plan the Layout: Before hammering any nails, consider the layout of your space. Determine the desired arrangement of your artworks - whether you want a single statement piece or a gallery-style display with multiple pieces. Use paper cutouts or painter's tape to mark the dimensions of your artworks on the wall, experimenting with different arrangements until you find the most visually pleasing arrangement.
2. Eye Level Rule: As a general guideline, the center of your artwork should be at eye level. This means the midpoint of the piece should be around 57 to 65 inches (145 to 165 cm) from the floor. This ensures comfortable viewing for most individuals. Remember to consider the average eye level of the people who will be viewing the artwork, which might vary in spaces where children or seated individuals are common.
3. Proper Support: Use appropriate hardware to hang your artwork securely. For heavier pieces, consider using wall anchors, screws, or picture-hanging hooks instead of nails. Choose hooks or hangers that can support the weight of your artwork. If unsure, consult a local hardware store or professional assistance to ensure proper support and prevent any damage to your walls.
4. Leveling: Use a level to ensure your artwork hangs straight. Crooked or misaligned paintings can disrupt the overall balance and aesthetic appeal. Take your time to ensure the artwork is straight and aligned with nearby furniture or architectural elements.
5. Lighting Considerations: Proper lighting can significantly enhance the visual impact of your paintings. Consider the lighting in the room and how it interacts with your artwork. Avoid placing paintings in direct sunlight as it can cause fading or damage. Experiment with different lighting fixtures, such as track lighting or adjustable wall sconces, to highlight your artwork and create the desired ambiance.
6. Create a Focal Point: Hang larger or more visually striking pieces in areas where they can serve as the focal point of the room. This can be above a fireplace, behind a seating area, or at the end of a hallway. A strategically placed artwork can add depth and character to any space.
7. Grouping Techniques: When creating a gallery-style display, consider the spacing between each artwork. Aim for consistent spacing, both horizontally and vertically, to maintain a cohesive look. Consider the overall balance of the grouping, mixing different sizes, styles, and orientations for visual interest.
Remember, hanging art paintings is an opportunity to elevate the visual appeal of your space and showcase your artwork in the best possible way. Apply these tips to create a harmonious display that enhances both the artwork and the environment. For further inspiration and assistance, visit our website at https://urartstudio.com by UrArtStudio, where you'll find more tips, insights, and resources on hanging art paintings as well as other aspects of the artistic journey. Let your artwork shine and captivate viewers with a well-executed display!
Questions and Answers
| Q: Hi Pete Thank you for the very inspiring lessons I would like to know if you are having the canvas on a table og if you are uing an asel. The very wet painting never run down the canvas when you paint. Also how long does it really take you to make the paintings....not just 10-20 minuts I think :o Bedst regards Birgit Andersen |
Click here to add your feedback
|
| A: Q: I would like to know if you are having the canvas on a table or if you are uing an asel. A: I usually have small canvases layed on the table and larger ones either on the floor or on the wall. Q: Also how long does it really take you to make the paintings A: it depends on the size of the painting and difficulty of the composition |
| |
| Q: Is there a way to sort through the website for paintings and see only 36 x 48 or larger Thank you James |
Click here to add your feedback
|
| A: use Advance Search link under search box in the top left corner of the home page |
| |
| Q: How can we Purchase paintings |
Click here to add your feedback
|
| A: You can simply submit your best offered price for immediate approval or if the painting has price next to it just click on add to cart button |
| |
| Q: Do you have any art work to do with surfing or skate-boarding for a teenagers room |
Click here to add your feedback
|
| A: I do not but I can always create one |
| |
| Q: Mr.peter i have seen your work its osumme also artist i also want to work in abstract please help me out |
Click here to add your feedback
|
| A: please visit my other website at abstractartlesson.com |
| |
| Q: How do you draft your ideas Or do you even sketch and just go straight to painting Because your type of art is what I like to paint or at least would like to. Im use to being a perfectionist in my art but i dont want that. I want to challenge myself and just paint and plan as I go. How do you do it |
Click here to add your feedback
|
| A: I would have a blurry idea of what I would like to paint and after choosing the colors I would outline the subject first if need be or just begin with the background colors and add elements as I go along |
| |
| Q: Hi there I sent my e-mail to get your free videos but the link you sent does not work please send me another one. I love your paintings and the way you do it thanks for sharing. |
Click here to add your feedback
|
| A: I have tried to email you back but your email blocks all incoming emails because the way your email is set up. This is the message I got when I tried to email you: Your email could not be delivered because the recipient is only accepting email from specific email addresses. |
| |
Tip: Embrace Your Creative Journey and Paint with Passion
Creating art is not just about the final outcome; it's a transformative and fulfilling journey of self-expression. Here's a motivational tip to inspire and empower you on your painting adventures:
1. Embrace Imperfection: Remember that art is subjective, and imperfections are what make your work unique and personal. Don't be afraid to embrace and celebrate the quirks and unexpected outcomes in your paintings. Embrace the imperfections as opportunities for growth and experimentation, and let them add character and authenticity to your creations.
2. Paint with Passion: Infuse your paintings with your genuine emotions and passion. Create from a place of love, excitement, and inspiration. Let your artwork reflect your inner world and tell your unique story. When you paint with passion, your art will resonate with viewers on a deeper level.
3. Trust Your Creative Instincts: As an artist, you possess a unique creative voice. Trust your instincts and allow your intuition to guide your artistic choices. Experiment with different techniques, colors, and subjects that resonate with you. Follow your own path, and don't be swayed by external opinions or trends. Your creative intuition is a powerful force that can lead to extraordinary artistic breakthroughs.
4. Embrace the Learning Process: View each painting as an opportunity to learn and grow. Understand that every artwork you create, regardless of the outcome, contributes to your artistic development. Embrace the journey of continuous learning, experimentation, and improvement. Be open to trying new ideas, stepping out of your comfort zone, and exploring uncharted territories. Remember, it's through the process of creating that you uncover new techniques, refine your skills, and discover your artistic voice.
5. Celebrate Milestones: Acknowledge and celebrate each milestone along your artistic journey, no matter how small. Whether it's completing a challenging artwork, receiving recognition for your work, or simply finding joy and satisfaction in the creative process, take a moment to appreciate and celebrate your progress. These milestones are stepping stones that fuel your motivation and inspire you to keep pushing forward.
6. Connect with Fellow Artists: Surround yourself with a supportive community of fellow artists. Engage in art groups, workshops, or online forums where you can exchange ideas, receive constructive feedback, and draw inspiration from others. The support and camaraderie of like-minded individuals can provide valuable encouragement, motivation, and shared learning experiences.
7. Stay Curious and Inspired: Cultivate a sense of curiosity and a thirst for inspiration. Seek inspiration from diverse sources - nature, books, music, films, exhibitions, and everyday life. Keep exploring new artistic styles, visiting galleries, and immersing yourself in different cultural experiences. The more you expose yourself to new ideas and aesthetics, the more your artistic vision will evolve and flourish.
Remember, your artistic journey is a personal and transformative experience. Embrace imperfection, paint with passion, trust your instincts, celebrate milestones, connect with fellow artists, stay curious, and maintain a genuine love for creating art. The world is waiting to witness the beauty you bring to life through your paintings. So pick up that brush, let your creativity flow, and paint your heart out!
Creating Stunning and Creative Special Effects in Acrylic Abstract Paintings on Canvas:
If you're looking to add an extra level of visual interest and intrigue to your acrylic abstract paintings on canvas, incorporating special effects can truly make your artwork stand out. Here are some tips to help you unleash your creativity and achieve stunning results:
1. Experiment with Texture: Acrylic paints are incredibly versatile and can be manipulated to create various textures. Explore different techniques such as applying thick impasto layers, using palette knives, or adding texture mediums like gels or modeling paste. These techniques can add depth and dimension to your abstract paintings, creating a visually captivating effect.
2. Incorporate Metallics and Iridescent Colors: Introduce metallic or iridescent acrylic paints into your artwork to add a touch of shimmer and visual intrigue. These paints reflect light in fascinating ways, creating a captivating play of colors and enhancing the overall depth and vibrancy of your abstract compositions. Experiment with metallic gold, silver, bronze, or iridescent colors to achieve eye-catching effects.
3. Explore Pouring Techniques: Acrylic pouring is a popular technique that produces mesmerizing abstract patterns and effects. Mix your acrylic paints with pouring mediums or flow improvers to create a fluid consistency that can be poured or dripped onto the canvas. Tilt the canvas to manipulate the flowing paint, allowing beautiful marbling, cells, and organic forms to emerge. This technique offers endless possibilities for creating unique and visually stunning effects.
4. Use Masking and Stencils: Utilize masking techniques or stencils to create distinct shapes or patterns within your abstract artwork. Apply painter's tape, masking fluid, or cut out stencils to cover specific areas of the canvas before painting. This allows you to create crisp lines, negative spaces, or intricate designs when the masking is removed. Experiment with combining different techniques to achieve multi-layered and dynamic compositions.
5. Play with Glazing and Layering: Glazing involves layering transparent or translucent colors over dried paint layers to create depth and luminosity. Apply thin glazes of transparent acrylic paint, thinned with glazing mediums, to build up layers of color and achieve a captivating play of light and shadow. This technique can create a sense of depth and complexity in your abstract paintings.
6. Experiment with Resists: Resists are substances that repel paint and create interesting effects when applied to the canvas. Wax, masking fluid, or even simple household items like salt can be used as resists. Apply the resist to specific areas before painting, and when the resist is removed, it reveals unique patterns and textures in your artwork.
7. Add Mixed Media Elements: Embrace mixed media by incorporating other materials into your acrylic abstract paintings. Explore adding collage elements, found objects, or textured materials like fabric or paper to create captivating layers and textures. The combination of acrylic paint with mixed media can add a dynamic and visually stimulating dimension to your artwork.
Remember, the key to achieving stunning and creative special effects in your acrylic abstract paintings on canvas is experimentation and embracing the unpredictable nature of the medium. Allow yourself to take risks, push boundaries, and let your imagination run wild. By incorporating these techniques and exploring new possibilities, you'll unlock immense potential for creating captivating and visually intriguing abstract artworks. Let the special effects become a powerful tool in expressing your unique artistic vision.
Interesting Art Fact:
Did you know that the world's largest art museum, the Louvre Museum in Paris, France, houses over 38,000 artworks and spans an impressive area of 782,910 square feet? It is home to iconic masterpieces such as Leonardo da Vinci's "Mona Lisa" and Eugène Delacroix's "Liberty Leading the People." With its extensive collection and rich history, the Louvre Museum stands as a testament to the incredible depth and diversity of artistic expression throughout the ages.
Every artist starts as a beginner, and the path to mastery is paved with dedication
Every artist starts as a beginner, and the path to mastery is paved with dedication, persistence, and self-belief. Here's some encouraging advice to inspire you on your artistic journey:
1. Embrace Your Uniqueness: Remember that your creative voice and perspective are unique. Embrace your individuality and don't compare yourself to others. Your art has the power to captivate, inspire, and touch others in ways that only you can achieve. Celebrate your own artistic style and trust in your creative instincts.
2. Embrace the Learning Process: Growth as an artist is a lifelong journey. Embrace the learning process and be open to experimentation and exploration. Don't be afraid to make mistakes, as they are valuable lessons that contribute to your development. Each stroke of the brush, each sketch, and each creation brings you closer to discovering new techniques, styles, and possibilities.
3. Celebrate Your Progress: Take the time to acknowledge and celebrate your progress, no matter how small. Every artwork you create is an achievement and a reflection of your dedication and passion. Celebrate the milestones along the way, whether it's mastering a challenging technique, receiving positive feedback, or simply experiencing the joy of creating. Cherish and appreciate the growth you achieve through your artistic endeavors.
4. Stay Inspired and Curious: Feed your artistic spirit by staying inspired and curious. Seek inspiration from various sources such as nature, literature, music, or other artists. Visit galleries, museums, and exhibitions to immerse yourself in the beauty and creativity of art. Allow yourself to be open to new ideas, styles, and perspectives. A continuously curious and inspired mindset fuels your artistic fire and keeps your creativity flowing.
5. Surround Yourself with Supportive Communities: Connect with fellow artists and supportive communities that understand and appreciate the artistic journey. Engage in art groups, classes, workshops, or online platforms where you can share your work, receive constructive feedback, and learn from others. The encouragement and camaraderie of like-minded individuals can provide motivation, inspiration, and valuable insights to help you grow as an artist.
6. Believe in Yourself: Above all, believe in yourself and your artistic abilities. Trust that you have the talent and potential to create meaningful and impactful artwork. Allow self-doubt to transform into self-belief. Remember that every renowned artist was once a beginner, and they achieved success by nurturing their creativity, persevering through challenges, and maintaining unwavering faith in their abilities.
Embrace your unique artistic journey, celebrate your progress, and always remember that your creativity has the power to make a difference. Trust in your abilities, stay inspired, and keep creating art that brings joy and inspiration to yourself and others.
Harnessing the Transformative Power of Creativity
Creativity is a remarkable force that has the power to transform lives and unleash boundless possibilities. Embrace your artistic journey, and let your imagination soar to new heights. Discover the joy and fulfillment that comes from tapping into your inner artist. Here's an encouraging advice to inspire you:
Advice: Embrace the Transformative Power of Creativity
Creativity resides within each of us, waiting to be unleashed. Embrace the transformative power of creativity, and let it guide you on a remarkable journey of self-expression and personal growth. Here's how:
1. Embrace Fearlessness: Take bold steps outside your comfort zone and embrace fearless experimentation. Don't be afraid of making mistakes, as they often lead to unexpected discoveries and breakthroughs. Embrace the unknown and let your creativity thrive in uncharted territories.
2. Cultivate a Curious Mindset: Stay curious and cultivate a hunger for knowledge and inspiration. Explore different art forms, immerse yourself in diverse cultures, and be open to new experiences. Allow the wonders of the world to fuel your imagination and broaden your artistic horizons.
3. Trust Your Intuition: Listen to your inner voice and trust your artistic instincts. Your intuition is a powerful compass that can guide you towards creating authentic and meaningful artwork. Embrace your unique artistic vision and let it shine through in your creations.
4. Embrace the Journey: Artistic growth is a continuous journey rather than a destination. Embrace the process and enjoy every step along the way. Recognize that progress occurs gradually, and each stroke of the brush or pencil brings you closer to mastery. Celebrate small victories and allow your passion for art to fuel your perseverance.
5. Connect with the Artistic Community: Surround yourself with fellow artists and join supportive artistic communities. Engage in conversations, seek feedback, and share your artistic journey. The encouragement and guidance of like-minded individuals can be a tremendous source of inspiration and motivation.
6. Nurture Self-Expression: Use art as a medium for self-expression and a way to communicate your thoughts, emotions, and unique perspective. Allow your artwork to tell your story and leave a lasting impact on others. Embrace vulnerability and authenticity, as they are powerful catalysts for creating meaningful art.
Remember, creativity knows no boundaries. Embrace the transformative power of creativity, and let your imagination flourish. Discover the joy and fulfillment that comes from expressing your innermost thoughts and emotions through art. Unleash your inner artist, and embark on a soul-stirring journey that will enrich your life and leave an indelible mark on the world.
Unleash Creativity with Precision: Elevate Your Abstract Art Painting using Masking Tape
Discover the transformative power of masking tape as a versatile tool to unlock precision and unleash your creativity in abstract art painting. At UrArtStudio.com, we demystify the techniques and possibilities of using masking tape in your artwork. Explore the seamless integration of sharp lines, defined edges, and intricate patterns, adding depth and dimension to your abstract compositions. Whether you seek a controlled contrast or a deliberate composition, masking tape offers a reliable ally in refining your artistic vision. Join us as we delve into the artistry of abstract painting with masking tape, where precision meets innovation, enabling you to create bold and captivating masterpieces. Step into a world of limitless possibilities, as you explore the interplay between chaos and structure, unveiling the transformative potential of masking tape in your artistic repertoire.
Embrace Creative Freedom: Break Boundaries and Make Your Own Rules
Experience the exhilarating journey of artistic liberation as you break boundaries and make your own rules. At UrArtStudio.com, we encourage you to embrace the power of creative freedom and challenge the status quo. Discover the joy of unleashing your unique artistic voice, unfettered by conventions and expectations. Dare to explore unconventional techniques, experiment with different styles, and forge your own path in the world of art. Empower your imagination to soar beyond limits, as you create authentic and thought-provoking masterpieces that reflect your true essence. Join us as we celebrate individuality, creativity, and the audacity to defy norms. Awaken the artist within, make your own rules, and embark on an extraordinary artistic journey that knows no boundaries.
Brushstrokes of Inspiration: Transcending Words to Create Art
Unlock the captivating synergy between storytelling and painting as you venture into a world where stories and poems inspire your artistic endeavors. At UrArtStudio.com, we encourage you to harness the power of narratives and verses, transcending words to give life to your artistic visions. Explore the depths of emotions, the nuances of characters, and the vivid imagery spun by a story or poem, allowing them to ignite your creative spark. With skilled guidance from our instructors, you'll learn to translate the essence of these literary works onto the canvas, bringing their magic to life through brushstrokes and color. Immerse yourself in the fluidity of storytelling and the evocative power of poetry, as you create art that encapsulates the essence of the written word. Join our artistic community where literature and painting merge, and experience the transformative journey of capturing the essence of stories and poems through your own unique artistic expression.
Building a Solid Foundation: Crafting a Framework for Your Painting Process
Create a framework that sets the stage for your painting process and aids in your artistic journey. Establishing a strong foundation will bring clarity, structure, and purpose to your artwork, ensuring a rewarding and fulfilling creative experience.
Start by defining your objectives and envisioning the final outcome of your painting. Consider the theme, mood, and message you wish to convey, allowing them to shape your artistic decisions throughout the process. Develop a clear concept or plan that acts as a guiding light, providing direction and focus as you bring your vision to life.
Next, explore and experiment with different techniques, materials, and color palettes that align with your artistic intent. Sketch rough drafts or create thumbnail studies to refine your composition and explore possibilities before diving into the final piece. This allows you to make well-informed decisions and build confidence before committing to the canvas.
Consider establishing a routine or schedule for your painting sessions, allocating dedicated time to immerse yourself in the creative process. Embrace both discipline and flexibility, allowing room for spontaneous inspiration while maintaining a structured approach to your work.
Document your progress along the way, capturing reference photos, sketches, and notes to track your artistic development. Regular self-reflection and critique enable you to identify areas for improvement, leading to growth and refinement in your technique.
Lastly, celebrate the completion of each artwork and take time to reflect on the lessons learned during the process. Use these insights to continually refine and enhance your framework, ensuring continuous growth and fulfillment in your painting practice.
With a well-crafted framework, you lay the groundwork for artistic success, providing a roadmap for your painting process and nurturing the evolution of your artistic voice. Embrace the journey, invest in the foundation, and watch your creative endeavors thrive.
Colors in Harmony: Exploring the Effects of Colors in Acrylic Abstract Painting
Unleash your creativity and immerse yourself in the whimsical world of acrylic abstract painting, where colors take center stage. Discover the profound impact that colors can have on your artistic expression, as they breathe life into your abstract creations.
With acrylic paints as your medium of choice, embark on a vibrant journey of self-expression. Explore the vast palette of colors at your disposal, from bold primaries to delicate pastels. Witness the enchanting interplay between hues as you layer and blend them, giving birth to captivating visual narratives.
Let the colors guide your artistic decisions, as they possess the power to evoke emotions, convey energy, and shape the overall mood of your artwork. Gradually build layers of paint, observing how different intensities, opacities, and textures interact harmoniously.
Embrace the principles of color theory to enhance your acrylic abstract paintings. Dive into the realm of complementary, analogous, or monochromatic color schemes, strategically applying colors to amplify desired effects. Delve into the interplay of warm and cool tones, understanding their ability to evoke specific emotions and create visual balance.
Visit our website, https://urartstudio.com, for a wealth of inspiration, tips, and tutorials devoted to acrylic abstract painting techniques. Discover the boundless possibilities of colors and unleash your artistic voice. Let the breath of your creativity flow through vibrant pigments as you embark on an exhilarating journey of self-expression. Elevate your acrylic abstract paintings to new heights, captivating viewers with the mesmerizing effects of colors.
ABSTRACT ART IS COMPLEX TO EXPLAIN Live Discussion Group
Abstract art is a captivating and complex form of visual expression that challenges traditional conventions and pushes the boundaries of creativity. Unlike representational art, which aims to depict recognizable subjects, abstract art embraces non-representational forms and conceptual ideas. It invites viewers to embark on a journey of interpretation and personal experience, engaging with the artwork on an emotional and intellectual level.
At the heart of abstract art lies the exploration of form, line, color, texture, and composition—the fundamental elements of art. Artists utilize these elements in innovative and thought-provoking ways to convey their unique perspectives and evoke specific feelings or reactions. Each brushstroke, drip, or mark on the canvas carries intention and significance, contributing to the overall aesthetic and meaning of the artwork.
Abstract art provides artists with the freedom to explore new realms of creativity, untethered from the constraints of depicting reality. It encourages experimentation, allowing artists to express their emotions, ideas, and concepts in unconventional and impactful ways. By embracing abstraction, artists can tap into their imagination, capturing the essence of a subject rather than its literal representation.
The principles of design also play a crucial role in abstract art. Balance, harmony, contrast, rhythm, and repetition are key elements that artists manipulate to create compositions that are visually appealing and visually engaging. The interplay between positive and negative space, the juxtaposition of vibrant and muted colors, and the dynamic relationships between various forms and shapes—all contribute to the overall aesthetic experience of abstract art.
If you're intrigued by the world of abstract art or interested in exploring your own creative journey, consider visiting our website at https://urartstudio.com. At UrArtStudio, we provide a wealth of helpful information, art-related articles, painting tips, and inspiration to enhance your understanding and appreciation of art. Whether you're a novice or an experienced artist, our platform offers resources to ignite your imagination, expand your artistic knowledge, and connect with a community of fellow art enthusiasts.
Join us on our website, explore our gallery of abstract art, and delve into the fascinating world of artistic expression. Discover the boundless possibilities of abstract art and unleash your own creativity. With UrArtStudio, you can embark on an artistic adventure that will inspire, inform, and empower you as you navigate the captivating realm of abstract art.